Your bathroom is cramped. That old tub takes up half the space. You never use it. Haven’t in years. What you actually want? A walk-in shower. Modern. Clean lines. Spacious. Luxurious even. But here’s what stops most Chula Vista homeowners: they think it’s complicated. Expensive. Risky. What if the plumber messes up? What if water leaks everywhere? What if it costs way more than expected?
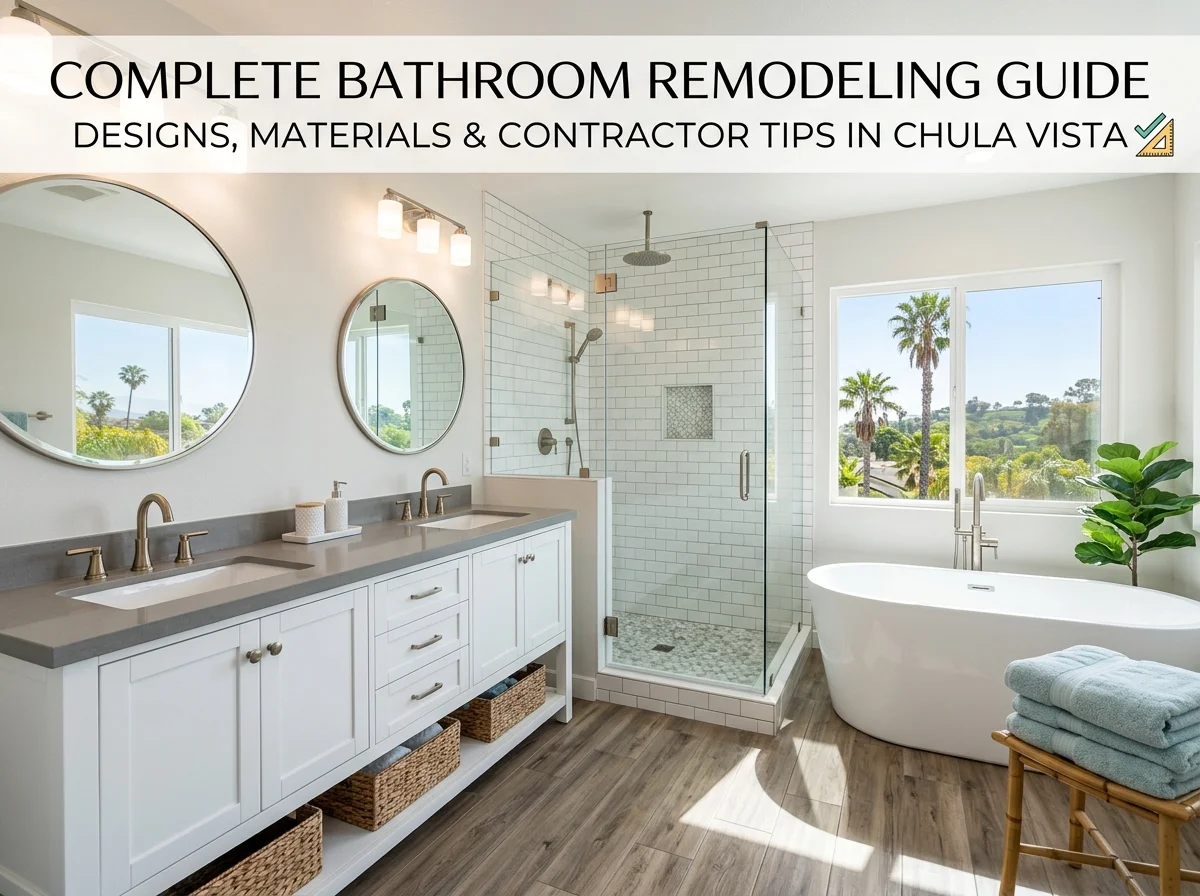
Here’s the truth: walk-in shower installation in Chula Vista is straightforward. Thousands of homeowners have done it. It transforms bathrooms. Adds value to homes. In fact, bathroom remodeling in Chula Vista is one of the best investments you can make, and walk-in showers are often the centerpiecey.
Why Walk-In Showers Make Sense in Chula Vista
Chula Vista homes are varied. Some older. Some newer. But many bathrooms are dated. Tubs that nobody uses. Outdated tile. Inefficient layouts. Walk-in shower installation modernizes everything. Makes the space feel bigger. Makes your home feel current.
Chula Vista’s climate helps too. Warm year-round. You don’t need a tub for occasional baths in cold weather. Showers work better. They’re practical. They’re efficient with water (important in Southern California). They look contemporary. Buyers love them.
From a practical standpoint, walk-in showers are safer. No tripping over the tub edge. No slipping getting in and out. Especially important if you’re aging in place. If you have mobility issues. If you have kids who hate baths. A good walk-in shower installation accommodates everyone.
Space matters too. A walk-in shower takes less floor space than a tub. Your bathroom feels bigger. Even if it’s not. Visual space counts. Psychological space counts. Both improve your experience daily.
Types of Walk-In Showers: What’s Possible
Walk-in showers aren’t all the same. Different options serve different needs. Different aesthetics. Different budgets.
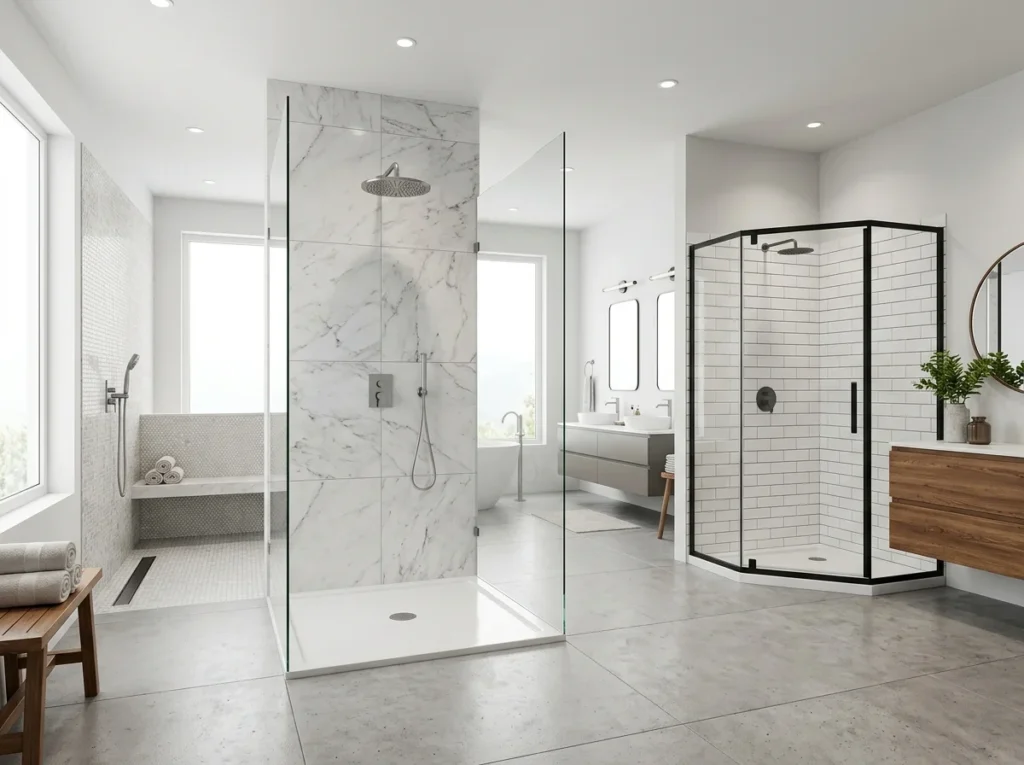
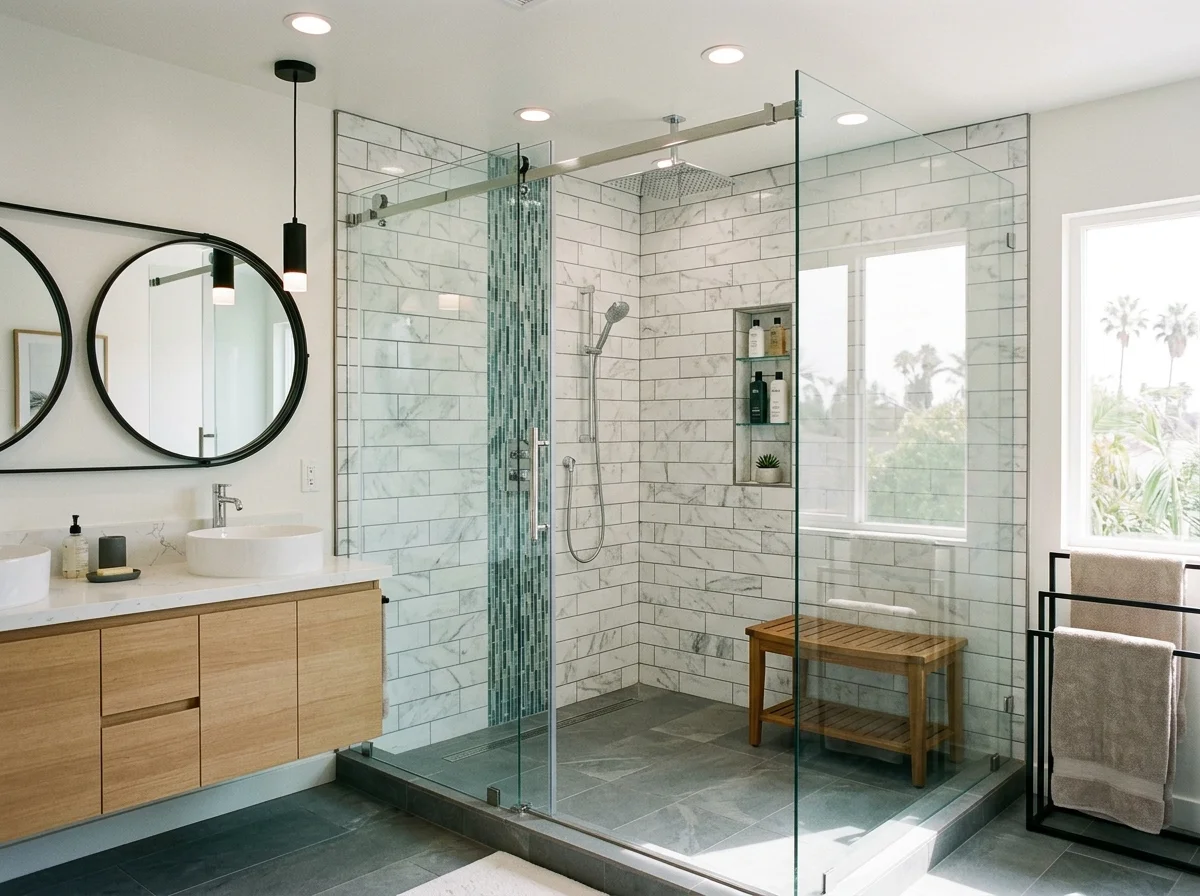
Frameless glass showers. This is the premium look. Frameless glass shower enclosures use thick tempered glass with minimal hardware. Clean. Modern. Luxurious. They’re expensive ($2,000-$5,000+ installed). But they look incredible. Light flows through. Bathroom feels open. This is what Pinterest bathrooms look like.
Framed glass showers. Metal frames hold the glass. Aluminum or chrome typically. Less expensive than frameless ($1,200-$2,500). Still look nice. More traditional than frameless. Various frame styles available. Some people prefer the structure and support of framing.
Acrylic or fiberglass surrounds. Pre-made shower surrounds. Usually three walls. Custom shower enclosure options exist, but most are standard sizes. Budget-friendly ($800-$2,000 installed). Durable. Easy to maintain. Don’t look as upscale as glass, but they work. They’re practical.
Tile showers. Classic. Timeless. You can design anything. Any color. Any pattern. Tile shower design is limited only by imagination. More expensive labor-wise (tile installation takes time). Grout maintenance required. But beautiful when done right. Premium look. Can cost $3,000-$8,000+ depending on tile choice and design complexity.
Wet rooms. Entire bathroom is shower. No enclosure. Water drains from the entire floor. European style. Ultra-modern. Luxury approach. Requires significant construction. Most expensive option. $5,000-$12,000+.
Each style works. Choice depends on budget, aesthetics, and practical needs.
Custom Shower Enclosure Options
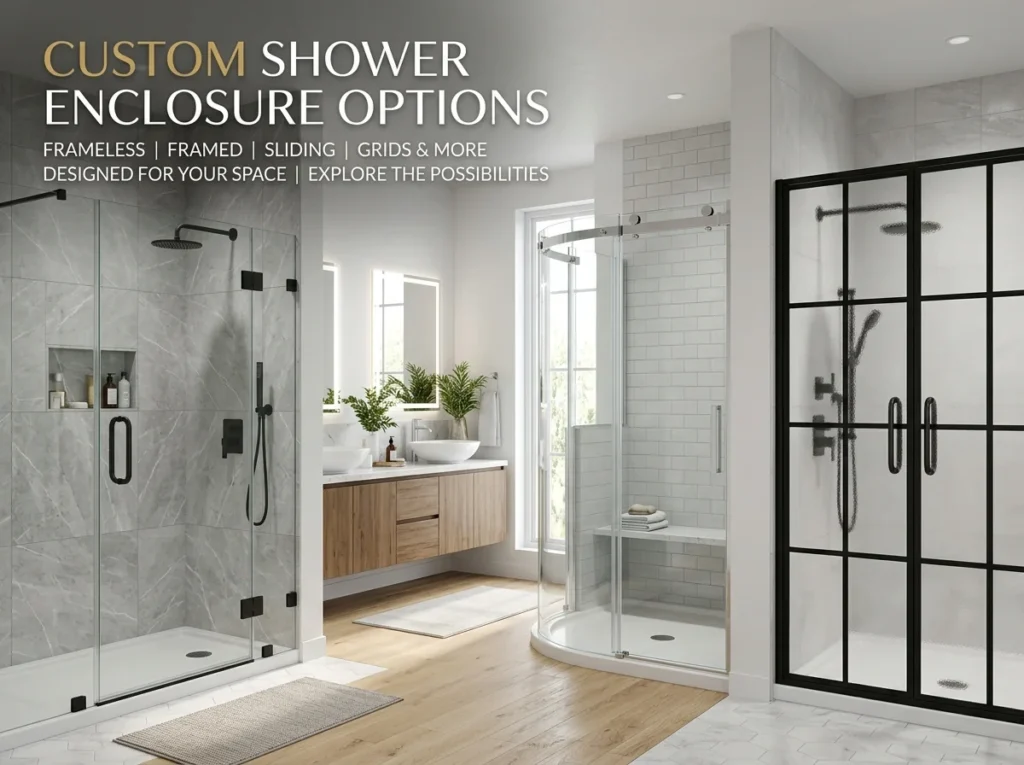
Custom shower enclosure design is where personality comes in. You can build exactly what you want.
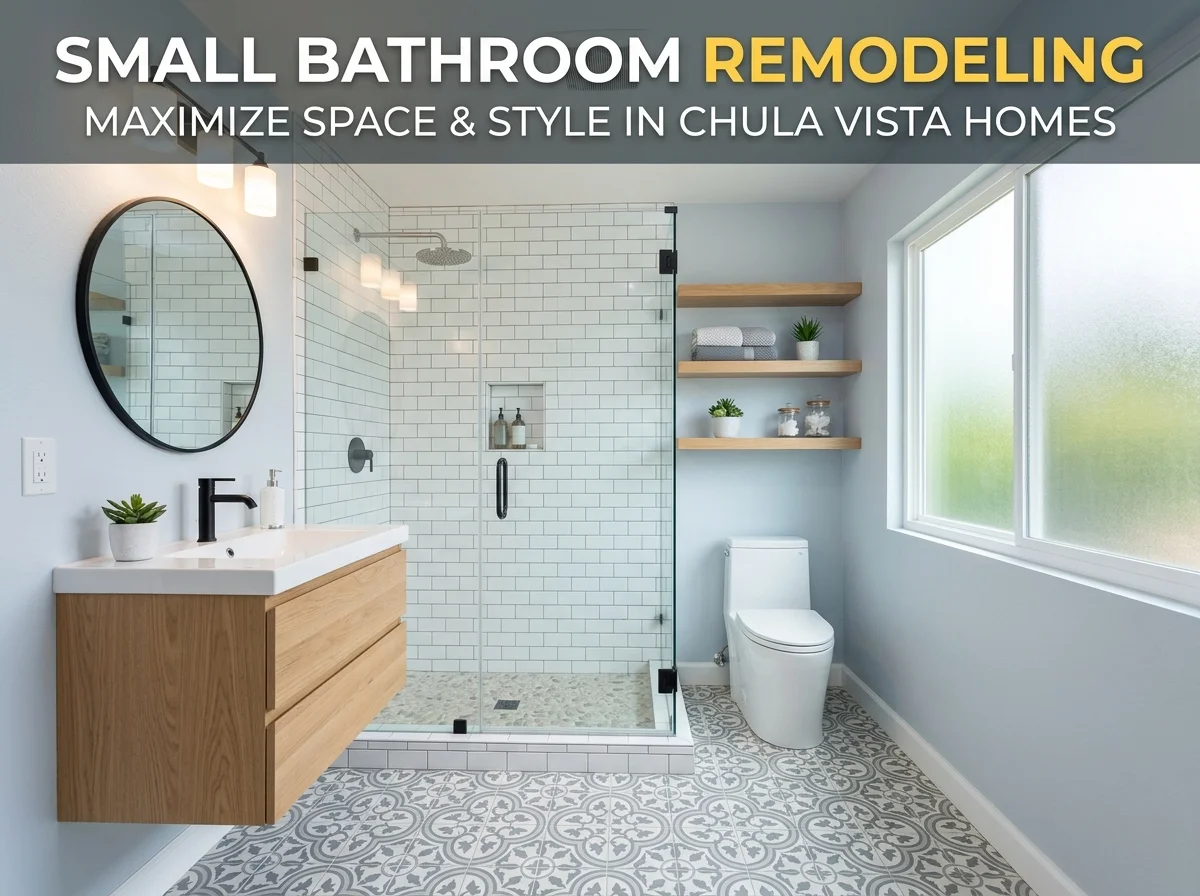
Size and layout. Standard is 36 inches wide by 48 inches deep. But you can go bigger. If you’re working with limited space, small bathroom remodeling solutions can maximize every inch while still delivering the walk-in shower you want.
Bench or seating. Built-in bench inside the shower. Practical for sitting. For foot washing. For shaving legs. Adds cost ($300-$500) but adds functionality. Highly appreciated feature.
Shower niches. Recessed shelving built into the wall. Holds shampoo bottles. Doesn’t take up floor space. Clean look. Shower niche installation costs $200-$400 but feels built-in and intentional. Multiple niches possible depending on wall space.
Rainfall shower system. Large overhead showerhead. Water cascades like rain. Luxurious feel. Creates spa-like experience. Rainfall shower system installation costs $400-$1,200 depending on quality. Body spray jets add more ($300-$600 per jet). Together they create amazing shower experience.
Curbless entry. No barrier. Step directly into shower. Looks modern. Safe for elderly or mobility issues. Requires careful drainage design. Professional installation essential. But worth it for accessibility and aesthetics.
Multiple showerheads. Rain head plus hand-held. Dual side body sprays. Thermostatic valve controls temperature. Creates premium experience. Costs $800-$1,500 for full setup.
Design possibilities are genuinely endless.
Shower Surrounds: Material Choices
Your surrounding walls matter as much as the enclosure.
Tile remains most popular. Porcelain or ceramic. Durable. Water-resistant when properly sealed. Tile shower design flexibility is unmatched. Size, color, pattern all customizable. Mosaics. Large-format tiles. Subway tile. Everything works.
Grout maintenance is real though. Grout stains. Mold grows in grout if not sealed properly. Professional installation and sealing prevents most issues. But maintenance is ongoing. Worth it for aesthetics usually. If you want zero maintenance, tile isn’t it.
Acrylic or fiberglass surrounds. Pre-made panels. Seamless installation. Zero grout. Zero maintenance. Durable for years. Less expensive. Less glamorous. But practical. Some people prefer this. Nothing wrong with that choice.
Quartz or stone. Engineered stone. Durable. Low maintenance. More expensive than tile. Beautiful appearance. Natural stone (marble, granite) is stunning but pricey and requires sealing. Engineered is better for bathrooms.
Waterproofing absolutely matters. Cheap materials cut corners. Water leaks behind walls. Mold grows. Damage is expensive. Proper waterproofing with membrane and sealing is non-negotiable. Budget for this. Don’t skip it.
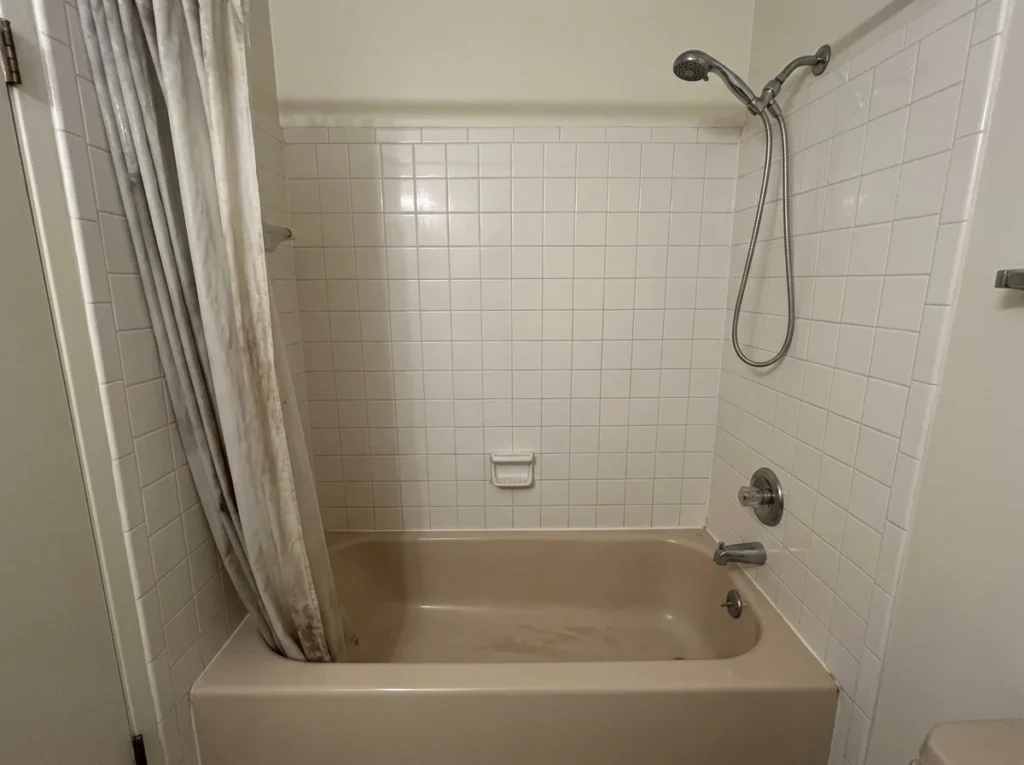
Tub-to-Shower Conversion: What You Should Know
Many Chula Vista homeowners convert existing tubs to showers. Practical reuse of space. But there’s complexity.
Plumbing matters. Tub plumbing often works differently than shower plumbing. Drain location. Water lines. Sometimes conversion is straightforward. Sometimes requires rerouting. A plumber assesses this before you commit. Budget unknown costs into timeline.
Floor issues. Tub sits on its own structure. Shower floor needs sloping for proper drainage. Existing floor might need reinforcement. Waterproofing becomes critical. Professional installation prevents leaks.
Wall prep. Tub walls often just had tile. Shower walls need moisture barriers first. Proper prep prevents water damage. This is where amateur jobs fail. Professional tub-to-shower conversion includes proper waterproofing from the start.
Timeline. Simple conversion takes 3-5 days. Complex conversion with plumbing changes takes 2-3 weeks. Demo, prep, plumbing, framing, waterproofing, tile, finish each step takes time. Can’t rush it. Rushing causes leaks.
Converting is usually cheaper than complete remodel ($3,000-$8,000 typical). But skipping steps costs way more later.
Walk-In Shower Installation: The Real Process
Here’s what actually happens when you install a walk-in shower.
Week 1: Planning and measurement. You meet with contractor. Discuss vision. Measure bathroom. Confirm drainage location. This is where professional bathroom remodeling contractors assess your space and create the perfect plan.
Week 2: Demo and prep. Existing tub and surround are removed. Walls and floor are opened up. Pipes are checked. Drains are routed if needed. Old materials disposed. Walls exposed.
Week 3: Plumbing and framing. New pipes run if needed. Drain slopes are confirmed. Framing gets new openings for niche if included. Electrical rough-in if adding ventilation or heated floors.
Week 4: Waterproofing. Moisture barrier installed on all walls. Proper sealing of corners and seams. This is critical. Prevents mold and water damage. Takes time but essential.
Week 5: Tile or surround installation. Shower pan installed. Walls are tiled or surround panels applied. Shower surrounds and enclosure ordered specifically. This is visible progress.
Week 6: Finishing. Grout sealed (if tile). Caulk applied. Hardware installed (handles, shelves, niche trim). Glass enclosure ordered and installed. Plumbing fixtures connected.
Week 7: Final touches. Testing everything. Checking for leaks. Adjusting water pressure. Final cleaning. Inspection approval if required.
This timeline assumes no complications. Complications happen (finding mold, structural issues). Budget extra 1-2 weeks minimum.
Walk-In Shower Installation Costs in Chula Vista
Real numbers. What you’re actually spending.
Basic conversion (acrylic surround, standard fixtures): $3,000-$6,000. Takes 2-3 weeks.
Mid-range (tile surround, frameless glass shower, standard fixtures): $8,000-$15,000. Takes 4-5 weeks.
Premium (custom shower enclosure, high-end tile, rainfall shower system, multiple features): $15,000-$30,000+. Takes 6-8 weeks.
Breakdown of typical costs:
Labor: 40-50% of total. Plumbing, tile, glass installation all require expertise.
Materials: 30-40% of total. Tile choice affects this most. Budget tile runs $5-$15 per sq ft. Premium tile runs $20-$100+ per sq ft.
Plumbing: $1,500-$3,000. Varies by complexity.
Electrical (ventilation, heated floor): $500-$1,500 if needed.
Glass enclosure: $1,500-$5,000+ depending on style.
Fixtures: $500-$2,000. Showerheads, handles, valves.
Permit and inspection: $200-$400.
Chula Vista costs are reasonable compared to nationwide. Southern California labor rates are moderate. Material costs are standard.
Get 3 quotes. Verify they include waterproofing, permits, inspection. Low quotes often cut corners on waterproofing. That’s where problems start.
Rainfall Shower System and Other Premium Features
Rainfall shower system is the luxury touch. Large overhead showerhead (usually 10-16 inches). Water cascades like rain. Pressure is gentler. Feels like spa experience.
Real cost: $400-$1,200 installed. Worth it if you spend $15,000+ on the whole project. Makes sense. If you’re doing budget conversion, maybe skip it.
Body spray jets. Side jets spray water. Creates full-body coverage. Premium feature. $300-$600 per jet. Usually 2-4 jets in luxury showers.
Thermostatic valve. Prevents scalding. Maintains temperature even if other water sources turn on. Excellent safety feature. $300-$500.
Heated floor. Radiant heating under floor tiles. Feels amazing in winter. Takes edge off cold tile. $1,000-$2,000 installed.
Steam shower option. Converts shower to steam room. Ultra-luxury. Requires plumbing and electrical work. $3,000-$6,000 just for steam component.
Lighting. Recessed lights. Chromotherapy (colored lights). Just makes shower experience better. $300-$800.
None of these are necessary. But they escalate the experience from functional to luxurious.
Choosing Materials: Tile and Glass
Tile selection defines the look completely. You’re staring at it every day. Choose carefully.
Large format tiles (12×24 or bigger). Modern look. Fewer grout lines. Cleaner aesthetic. Easy to clean. Slightly more expensive but worth it.
Subway tile (3×6). Classic. Timeless. Works with any design. Can look dated if not styled right. But versatile.
Mosaics. Decorative. Accent tiles. Add personality. More grout lines means more maintenance.
Glass tile. Shiny. Reflects light. Makes space feel bigger. Can look cold if overused. Mix with other tiles.
Natural stone. Marble, slate, granite. Beautiful. Pricey. Requires sealing. More maintenance. Worth it aesthetically.
Color. Light colors make bathrooms feel bigger. Dark colors feel cozy but smaller. Neutral works everywhere. Bold colors take balls (but some people love them).
For frameless glass shower, consider:
Clear glass. See everything. Most transparent. Most common.
Frosted glass. Privacy. Softer look. More forgiving of water spots.
Textured glass. Unique look. Hides water spots better. More expensive.
Smoked or tinted glass. Darker. Contemporary. Hide flaws. Some find too dark.
Finding the Right Contractor in Chula Vista
Not all contractors understand walk-in shower installation complexity.
Experience specifically with showers. Ask how many shower installations they’ve done. Ask for references. Call them. Did water leak? Is grout holding up? Did they deliver on timeline?
Waterproofing knowledge. Ask specifically about waterproofing methods. If they can’t explain it confidently, they don’t do it right.
Licensed and bonded. California requires plumbing licenses. Verify through CSLB. Insurance matters. If they break something, you’re protected.
Written contract. Everything in writing. Scope of work. Timeline. Cost. What happens if problems arise. What warranty is provided.
Tile or glass references. Ask to see past work. Visit completed showers if possible. See quality firsthand.
Timeline reality. Don’t trust anyone promising 1-week installation for quality work. Quality takes time. Realistic timeline is 4-8 weeks.
Warranty. Get something in writing. Labor warranty minimum 1 year. Material warranties vary. Tile usually lifetime (if properly installed). Glass typically 1-2 years.
Chula Vista has good contractors. Some excellent ones. Do your due diligence. Wrong contractor costs tens of thousands in repairs.
FAQ About Walk-In Shower Installation
How long does walk-in shower installation actually take in Chula Vista?
Simple conversion (acrylic surround, no plumbing changes) takes 2-3 weeks. Complex installation (tile, glass, plumbing work) takes 4-8 weeks. Delays happen (finding mold, structural issues, material delays). Budget 8 weeks to be safe. Rushing causes problems.
What’s the real cost difference between tile and acrylic surround?
Acrylic surround costs $800-$2,000 installed. Tile runs $3,000-$8,000+ depending on tile choice. Labor is the big difference. Tile installation is slow. Acrylic is faster. Premium tile (marble, natural stone) costs way more than budget tile.
Do I need a permit for walk-in shower installation?
Chula Vista requires permits for plumbing work. Shower installation involves plumbing (drain, water lines). Budget for permit ($200-$400) and inspection. It’s non-negotiable. Unpermitted work causes problems when selling.
Should I choose frameless glass or framed?
The frameless glass shower looks more modern and luxurious. Framed is more traditional. Frameless costs more ($2,000-$5,000 vs $1,200-$2,500). Both work functionally. Choose based on aesthetics and budget. Frameless is worth it if doing premium remodel. Framed is smart for budget-conscious people.
What’s the most expensive mistake people make with showers?
Skipping waterproofing. Cheap contractors rush this. Water leaks behind walls. Mold grows. Structural damage happens. Fixing costs $5,000-$15,000+. Proper waterproofing upfront costs $500-$1,000 extra. Worth every penny.
Can I install a walk-in shower if my bathroom is small?
Smaller showers work fine. 36×48 is perfectly functional. Curbless entry makes small spaces feel bigger. Good lighting helps. Minimize niche and extras. Small bathrooms benefit most from shower conversion (tub takes up so much space).